For next week: Sketches of final website design.
What needs to be determined before we start designing our website...
Target audience
What the audience needs to see (determines the content)
Purpose of the website
Limitations...
Web safe colours
Web safe typefaces
File size
Resolution, screen size 800x600
Working with html
html stands for.. Hyper text mark up language
<body>
body of the webpage, content
</body>
close body
<html>
indicates to the computer that we are speaking in html language
</html>
closes the html language
<title>
web browser title
</title>
close title
<head>
Something thats not visible, descriptive, eg google search words
</head>
close head
For a simple website design, the html tags would go in this order
<html>
<head>
<title>
</title>
</head>
<body>
</body>
</html>
These tags will appear on every website, but with more content and complex html coding included.
Simple html coding for basic website saying 'hello world!'... the first ever website created on the world wide web.
Other tags...
script or javascript allows you to use more advanced features of the web as html can be quite restrictive.
td hight and width, is table data or tr is table rows.
metalane, google search engine, key words .
div is directly linked to css, linked to how everything is divided into boxes.
To start we need a root folder, which we can call anything you want. The web domain name is usually best. Then we need an images sub folder. Every website in the world has these two folders. A root folder and an images sub folder.
Welcome screen.
Middle column, languages.. html, PHP (if a website, Amazon for example has a lot of similar pages, like products then a separate page isn't designed for each one. A spreadsheet is made and the product is accessed and the page redirected through this).
Create a new page
You can select between three biews, code, split and design.
Create a new site
Click on the folder and select your root folder
Save your page straight away in your root folder. It will have to be called 'index' which is the internationally recognised word for your home page.
You can preview your website in different browsers by clicking on the globe.
At the moment the page is called untitled page, you can change this between the title tags.
Anything you type between the body tags will appear on your site.
Create a new document (command and n) and select css, then save it into your root folder as a style sheet.
To edit the body type in body { and a drop down menu will appear.
Always put the attributes on a new line to make it as clear as possible.
select font family.
The final css coding for the font and colour of the text.
Save this as 'style sheet' in your root folder.
Attach the style sheet to the html by clicking on the link icon and select the style sheet file in your root folder.
Edit the style sheet to add a background colour (hash tag is alt 3)
Save and then add to your html by adding the following inside the body section of your html. If you type <div id a drop down menu showing the wrapper title will automatically appear.
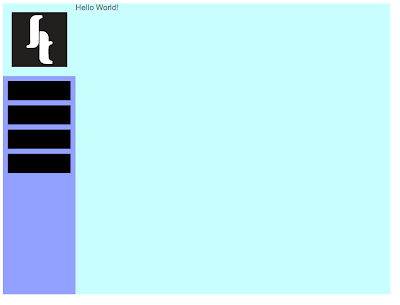
Now add to your css coding to add a navigation box to your design.
Add this to the body section of you html coding by typing <div id and selecting navigation.
Open a new Photoshop document to make a logo. Add the right size and make sure the background is transparent. Make sure that the document is set to web.
Save as web & devices as a PNG
Adding buttons
I need to include ;
}
om the end of the background colour for it to work.
Woo!
html colour codes...
http://www.computerhope.com/htmcolor.htm


