Wednesday, 30 November 2011

Silent Movie

Storyboards


For today's session with Fred we had to have ready for each of the two words  we were given (mine being click and disperse)...

20 words relating to the word
20 definitions of the word
20 situations relating to the word
20 objects relating to the word
20 Fonts that communicate the word, in a large, medium and small point size

Click


Words
  • Snap
  • Bang 
  • Beat 
  • Tick
  • Chink
  • Grasp
  • Mouse
  • Flick
  • Clack
  • Cluck
  • Dawn
  • Fathom
  • Apply
  • Choose
  • Select
  • Break
  • Crack
  • Score 
  • Fracture
  • Pop
  • Flash
  • Button
  • Instant
  • Metallic
  • Sound 
  • Moment
  • Rap 
  • Tap 
  • Wink
  • Apron
  • Cursor
  • Concur
  • Fit 
  • Match 
  • Choose 
  • Knock
  • Remote
Definitions
  • A stop consonant made by the suction of the mouth
  • Metallic sound
  • Sharp noise
  • A small device for preventing backward movement of a mechanism
  • Clicking a computer mouse to select something on screen
  • Cocking of a pistol
  • To succeed, make a hit
  • Fit together with ease
  • To get on well with someone
  • Become suddenly clear
  • Make a selection
  • Move or strike with a noise
  • Depression on a computer mouse
  • Make a clicking or ticking sound
  • Click repeatedly or uncontrollably, e.g. chattering teeth
  • Cause to make a snapping sound
  • Become clear or enter one's consciousness or emotions
  • Fall into place
Situations
  • Using a computer mouse 
  • Clicking fingers
  • Stretching- clicking back
  • Clicking of a clock
  • Cursor selecting something on screen
  • The monotonous drone in the mac suites
  • Sound of a camera taking a picture
  • Cracking knuckles
  • Breaking of a bone
  • Winking
  • Clicking of a pen
  • Closing a lid
  • Chattering teeth
  • Person tutting
  • Hen clucking
  • Clicking on the light
  • Click of a latch or lock
  • Snap when breaking a stick
Images


Fonts


Disperse

Words
  • Scatter 
  • Banish 
  • Besprinkle 
  • Break up
  • Broadcast
  • Cast forth
  • Circulate
  • Deal 
  • Diffuse
  • Disappear
  • Disband
  • Disburse 
  • Discharge
  • Dislodge
  • Dismiss
  • Dispel
  • Disseminate
  • Dissipate
  • Dissolve
  • Eject
  • Intersperse
  • Partition
  • Radiate
  • Scatter
  • Scramble
  • Send off
  • Separate
  • Shed
  • Vanish
Definitions
  • To pay out or expend
  • To scatter something 
  • To drive or send off in various directions
  • To disperse a crowd
  • To spread widely, disseminate
  • To dispel; cause to vanish
  • To cause particles to separate uniformly throughout a solid, liquid or gas
  • To subject to dispersion
  • To separate and move apart in different directions without order or regularity; become scattered
  • To be dispelled; scattered out of sight
  • To vanish
  • Denoting a phase dispersed in another phase, as in colloid 
  • To strew or distribute widely
  • Distribute loosely 
  • To cause to separate and go in different directions
  • Move away from each other
  • Cause to become widely known
  • To distribute
Situations
  • Tre branches/ roots growing
  • Tea bag/ coffee/ sugar dissolving in water
  • Steam from a shower
  • A crowd separating
  • Ice cube melting 
  • Candle burning and melting
  • Yarn ball unravelling
  • Dropping change
  • Throwing confetti
  • Blowing dandelion
  • Flock of birds flying away
  • Fireworks
  • Adding dye to fabric
  • Spilling water
  • Dropping an egg
  • Snow
  • Smell
  • Tablet in water
  • Ear drop
  • Virus spreading
  • Blossom falling from trees
  • Veins
  • Viral video
  • Science equation
  • Sprinkling seeds
  • Sprinkling sugar
  • Sprinkling salt
  • Cooking, sprinkling herbs and spices
  • Children leaving school
  • People getting off a train
  • Herd being chased by lions
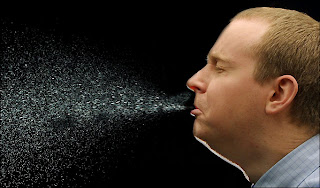
  • Sneeze
Images


Fonts


Tuesday, 29 November 2011

After Effects Induction

Instead of creating a new document, on After Effects you make a new composition.


First you select your preset, which is similar to A formats when working for print. They are for different regions and screen formats. In the UK we are PAL, in the US they are NTSC. This is because we have different frames per second, we have a frame rate of 25 and they have a 29.7 frame rate.
A widescreen format has an aspect ratio of 16:9.


You set the duration of the clip before you start creating it. 


We need to remember that we are working with RGB. Also when its is set to zero the colour is black (absence of colour) and 255 (which is the maximum end of the scale) is white.


The first thing to do is create a new layer.


Any numeric value that is yellow means that you can edit it.


A layer can only contain one thing at a time, for now we have created a red square. You can see the timeline below that the square is there for the whole duration of the ten second movie.
The timeline represents the duration and the screen represents the visual.


On the timeline we have a current time indicator. If we drag the red line representing the square, we can change the amount of time that it appears in your movie.


If we drag around the timeline and add new layers we can see the effects by dragging around the time ruler.


If you press the spacebar it plays and pauses your movie. This only shows you a slow motion version of your clip, as its too much for the programme to handle to play it at real time.

If you want to preview it in real time then you can using the preview window. This buffers it first so that it can process the information.


You can increase and decrease the quality of your video if you find that the visuals aren't good enough, or it keeps jumping. However this doesn't change the quality of your final piece.


You notice that just like on Photoshop your objects will stack in the order of the layers.


Their is a zoom in and out menu on the control panel. Also when the control menu is selected then you can used the scroll wheel on your mouse, or control plus and minus.


If you want to zoom the timeline you drag the small grey bar at the top of the timeline window. Beyond a certain point you get down to frames so that you can edit frame by frame in order to be accurate.


If you press the 'tilda' key (the one between the z and shift) whichever window is selected will enlarge to fit the screen.

Each layer has its own individual transform options.


If you select on the little stopwatch symbol next to one of the transform options the it automatically adds a keyframe. Adjust the position for example and the position of the time ruler and a second yellow diamond will appear indicating the beginning and end of the keyframe. The object will move gradually between the coordinates between the time that you indicate.


The red line indicates where the object is moving to.


If you move the time line past the keyframes and then move that object, it automatically extends the keyframe.
The curves used to trace the path of an object between key frames are similar to the curves on illustrator. You can drag the anchor point about to edit the curves and path of the object.


It is quite useful to copy and paste keyframes, just select them and control c to copy and control v to paste. They can also be copied to different layers. They will be pasted from where you time ruler is.


If you want to shorten a timeline on one of the layers and compress the keyframes to keep them positioned correctly. Rather than moving them individually select them all and hold down alt to shrink them down.

If you change the length of the thicker grey bar then when the time ruler hits the end of it, the clip automatically loops.


Shortcuts:

If you use these when the timeline window is selected these transformations show up.
P- position
R- rotation
T- opacity
A- anchor point
S- scale

Command A selects everything.

I- jumps the time ruler to the 'in' point
O- jumps the time ruler to the 'out' point

B- 'begin' makes the timeline start at the begin at the in point of that layer
N- make the timeline end at the out point of that layer

U- opens up all animated properties of the layers
double U- shows everything you have modified on all layers


H.264 is the file size you should export your file into.